
Configuring X (Twitter)
If using X (Twitter) to publish posts, you'll need a developer account and an app configured for posting.
Get started with X (Twitter)
Register as an X developer
Developer account required
Already have an X developer account? Skip ahead to "Create a project and app".
- Go to developer.x.com and sign in with the X account you want to post from.
- Set up a developer account.
- Once you've created the account, you will be prompted to purchase credits.
The cost of posting is determined by whether the post includes a URL.
| Post Type | Rate |
|---|---|
| No URL | $0.015 / post |
| Includes URL | $0.20 / post |
Posting is a paid feature
To post, you will need a billing-enabled X developer account for API access.
⚠️ Developer accounts are completely unrelated to X Premium subscriptions (Basic, Premium, or Premium+).
Having a Premium subscription does not grant API access, a separate developer account is still required.
Create an app
- In the side navigation, go to Apps.
- Click the Create App button in the top right corner.
- Name your app (no spaces). Leave the environment as Development for now.
- On creation, you'll see new credentials. Ignore these, since they'll need to be regenerated after setting Read and write permissions in the next steps.
Set up authentication
The default read-only behavior does not allow posting. Set the app's Read and write access here...
- In your new app, open Settings.
- Under App permissions, choose Read and write.
- Under Type of App, choose Web App, Automated App or Bot (Confidential Client).
- Fill in the required Callback URI / Redirect URL and Website URL. Notifier doesn't use these, but X requires them. You can use your site's URL for both (for example
https://example.com/callbackandhttps://example.com). - Click Save.
Set permissions before generating tokens
The order matters. If you generate access tokens before enabling Read and write, they will be read-only and posting will fail.
Generate the four OAuth keys
Open the app's Keys & Tokens tab and scroll down to OAuth 1.0 Keys.
Everything you need is in the OAuth 1.0 Keys section. Ignore the OAuth 2.0 Keys and App-Only Authentication sections, they are not relevant here.
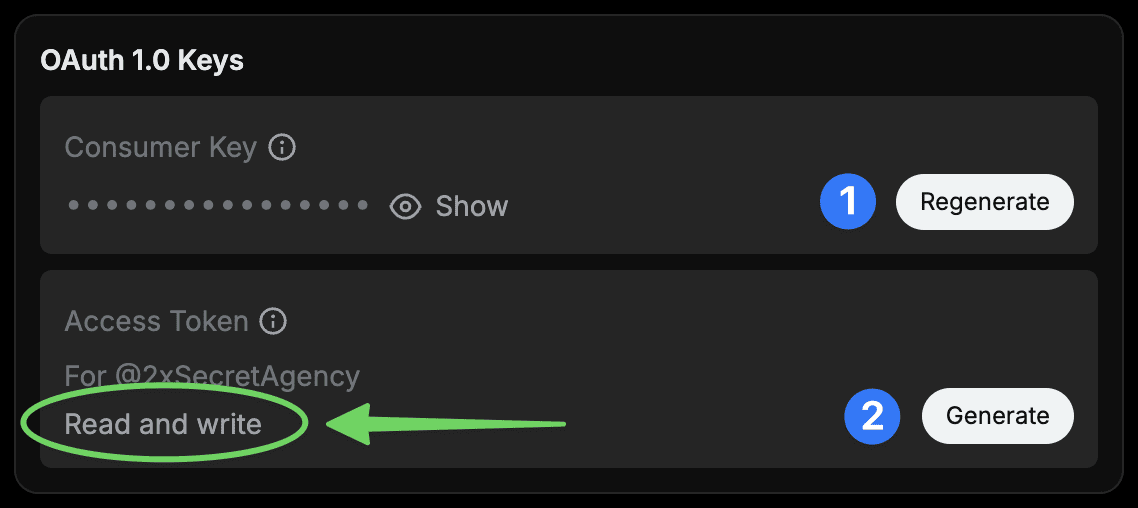
Confirm the Access Token says "Read and write"
The Access Token shows the permission it was created with. It must say Read and write.
If it shows Read only, make sure you enabled write access. Click Generate to update the token.
When you Regenerate/Generate the Consumer Key and Access Token, each will produce a pair of values.
Copy all four of these into your .env file so you may reference them later.
- Consumer Key and Consumer Key Secret
- Access Token and Access Token Secret
These keys will never expire on their own, you can revoke them manually if needed.
Protect your credentials
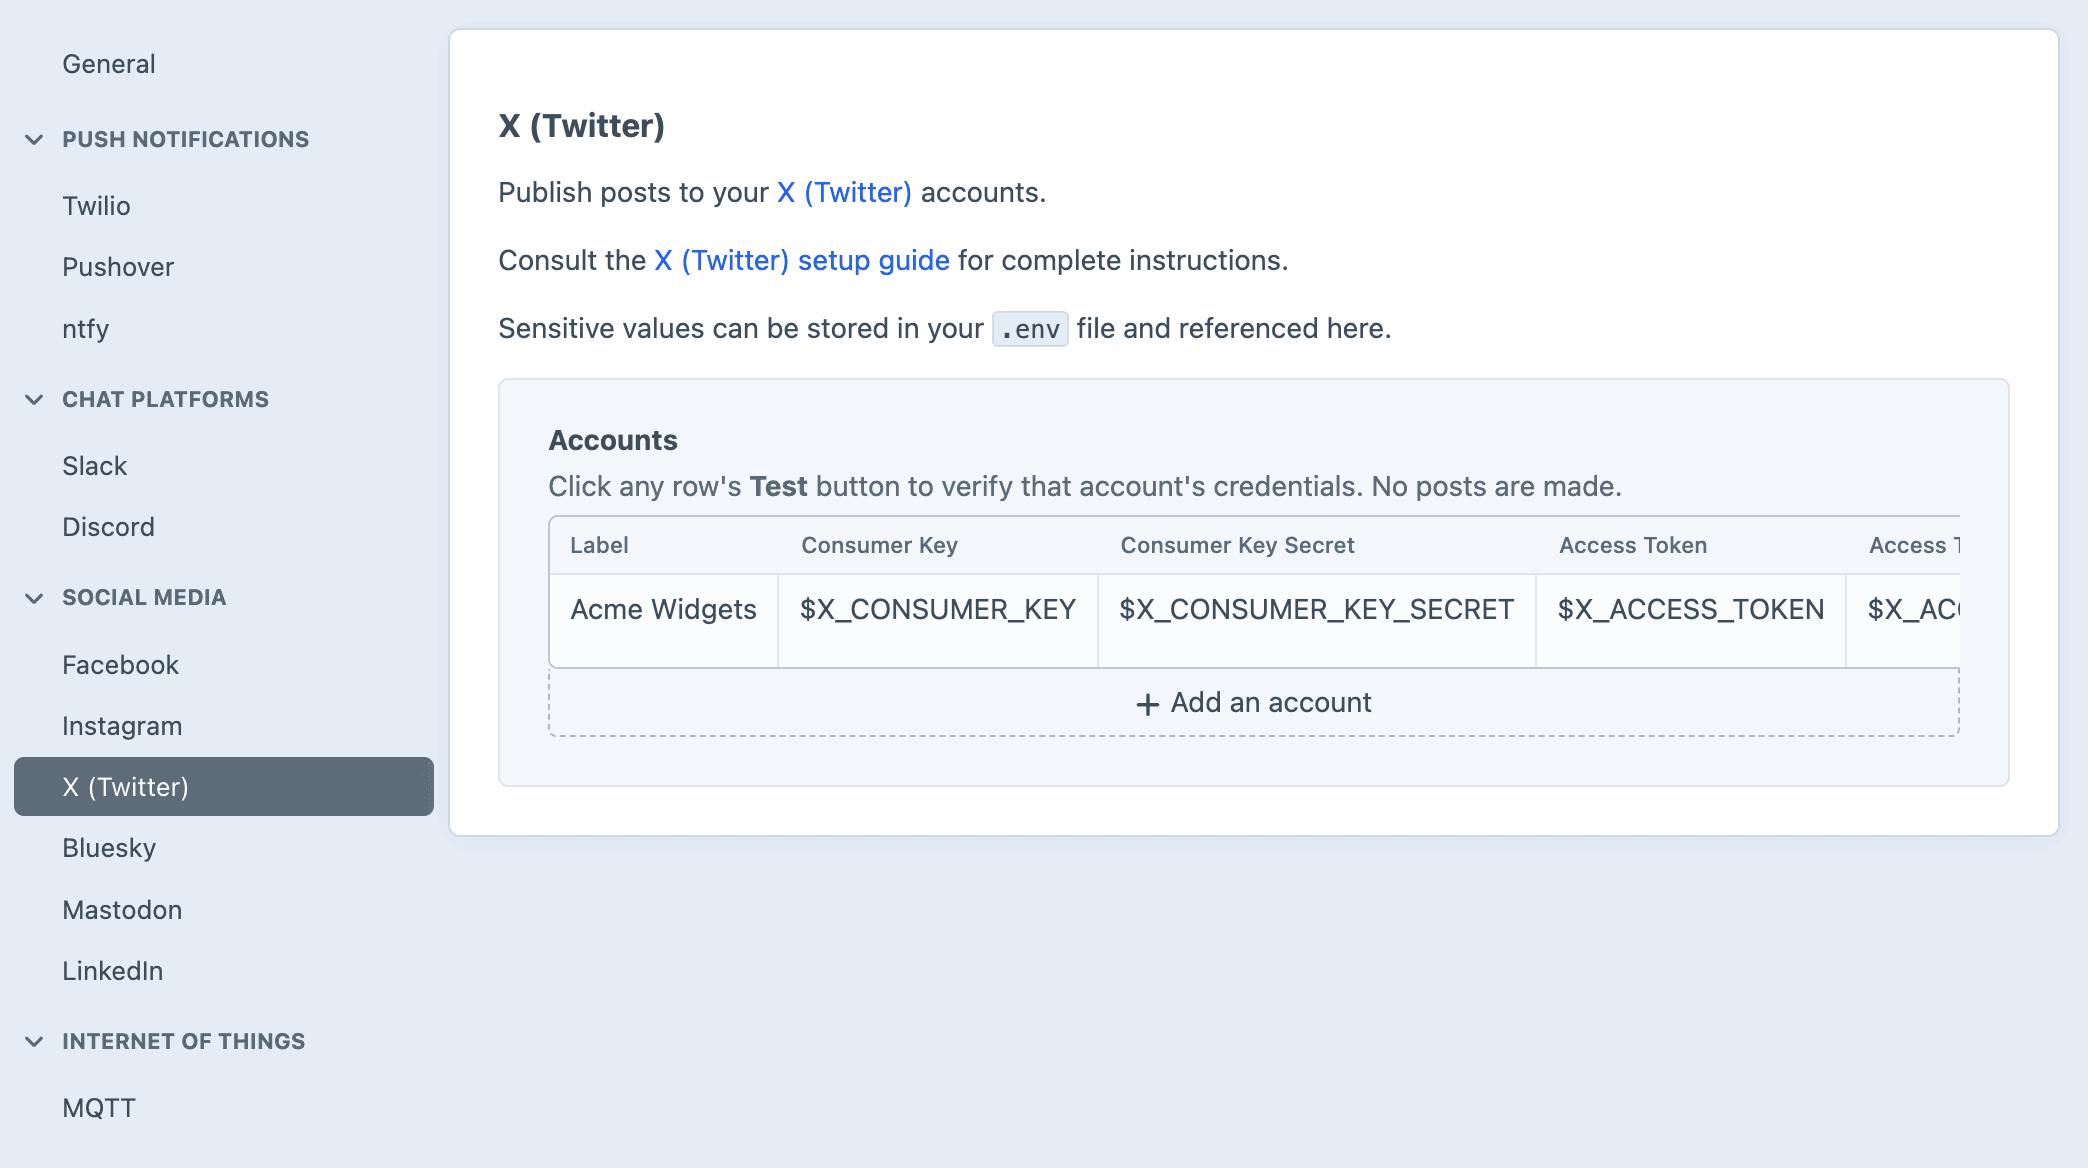
Anyone with these four values can post as your account. Keep each in a .env variable so the secrets never end up in your project config.
Troubleshooting
Duplicate posts will be rejected
X (Twitter) may reject a post whose text is identical to a recent one. If you are testing repeatedly, vary the text between attempts.
If a post fails with 403 Forbidden
Most likely, the access tokens are read-only. Set the App permissions to Read and write, then regenerate the Access Token and Access Token Secret.
If a post fails with 402 Payment Required
Your X developer account is out of credits. Posting is pay-per-use, so once your balance reaches zero, X rejects every post with a CreditsDepleted error ("Your enrolled account does not have any credits to fulfill this request"). Top up your balance under Billing at console.x.com, then try again. Fresh credits can take a few minutes to apply.
If a post fails with 401 Unauthorized
One of the four keys is wrong. Recopy each value from the Keys & Tokens tab, and confirm each .env variable name matches what you reference on the settings page. If needed, regenerate all four keys.