
Configuring ntfy
If using ntfy to send push notifications, you'll first need to specify a topic.
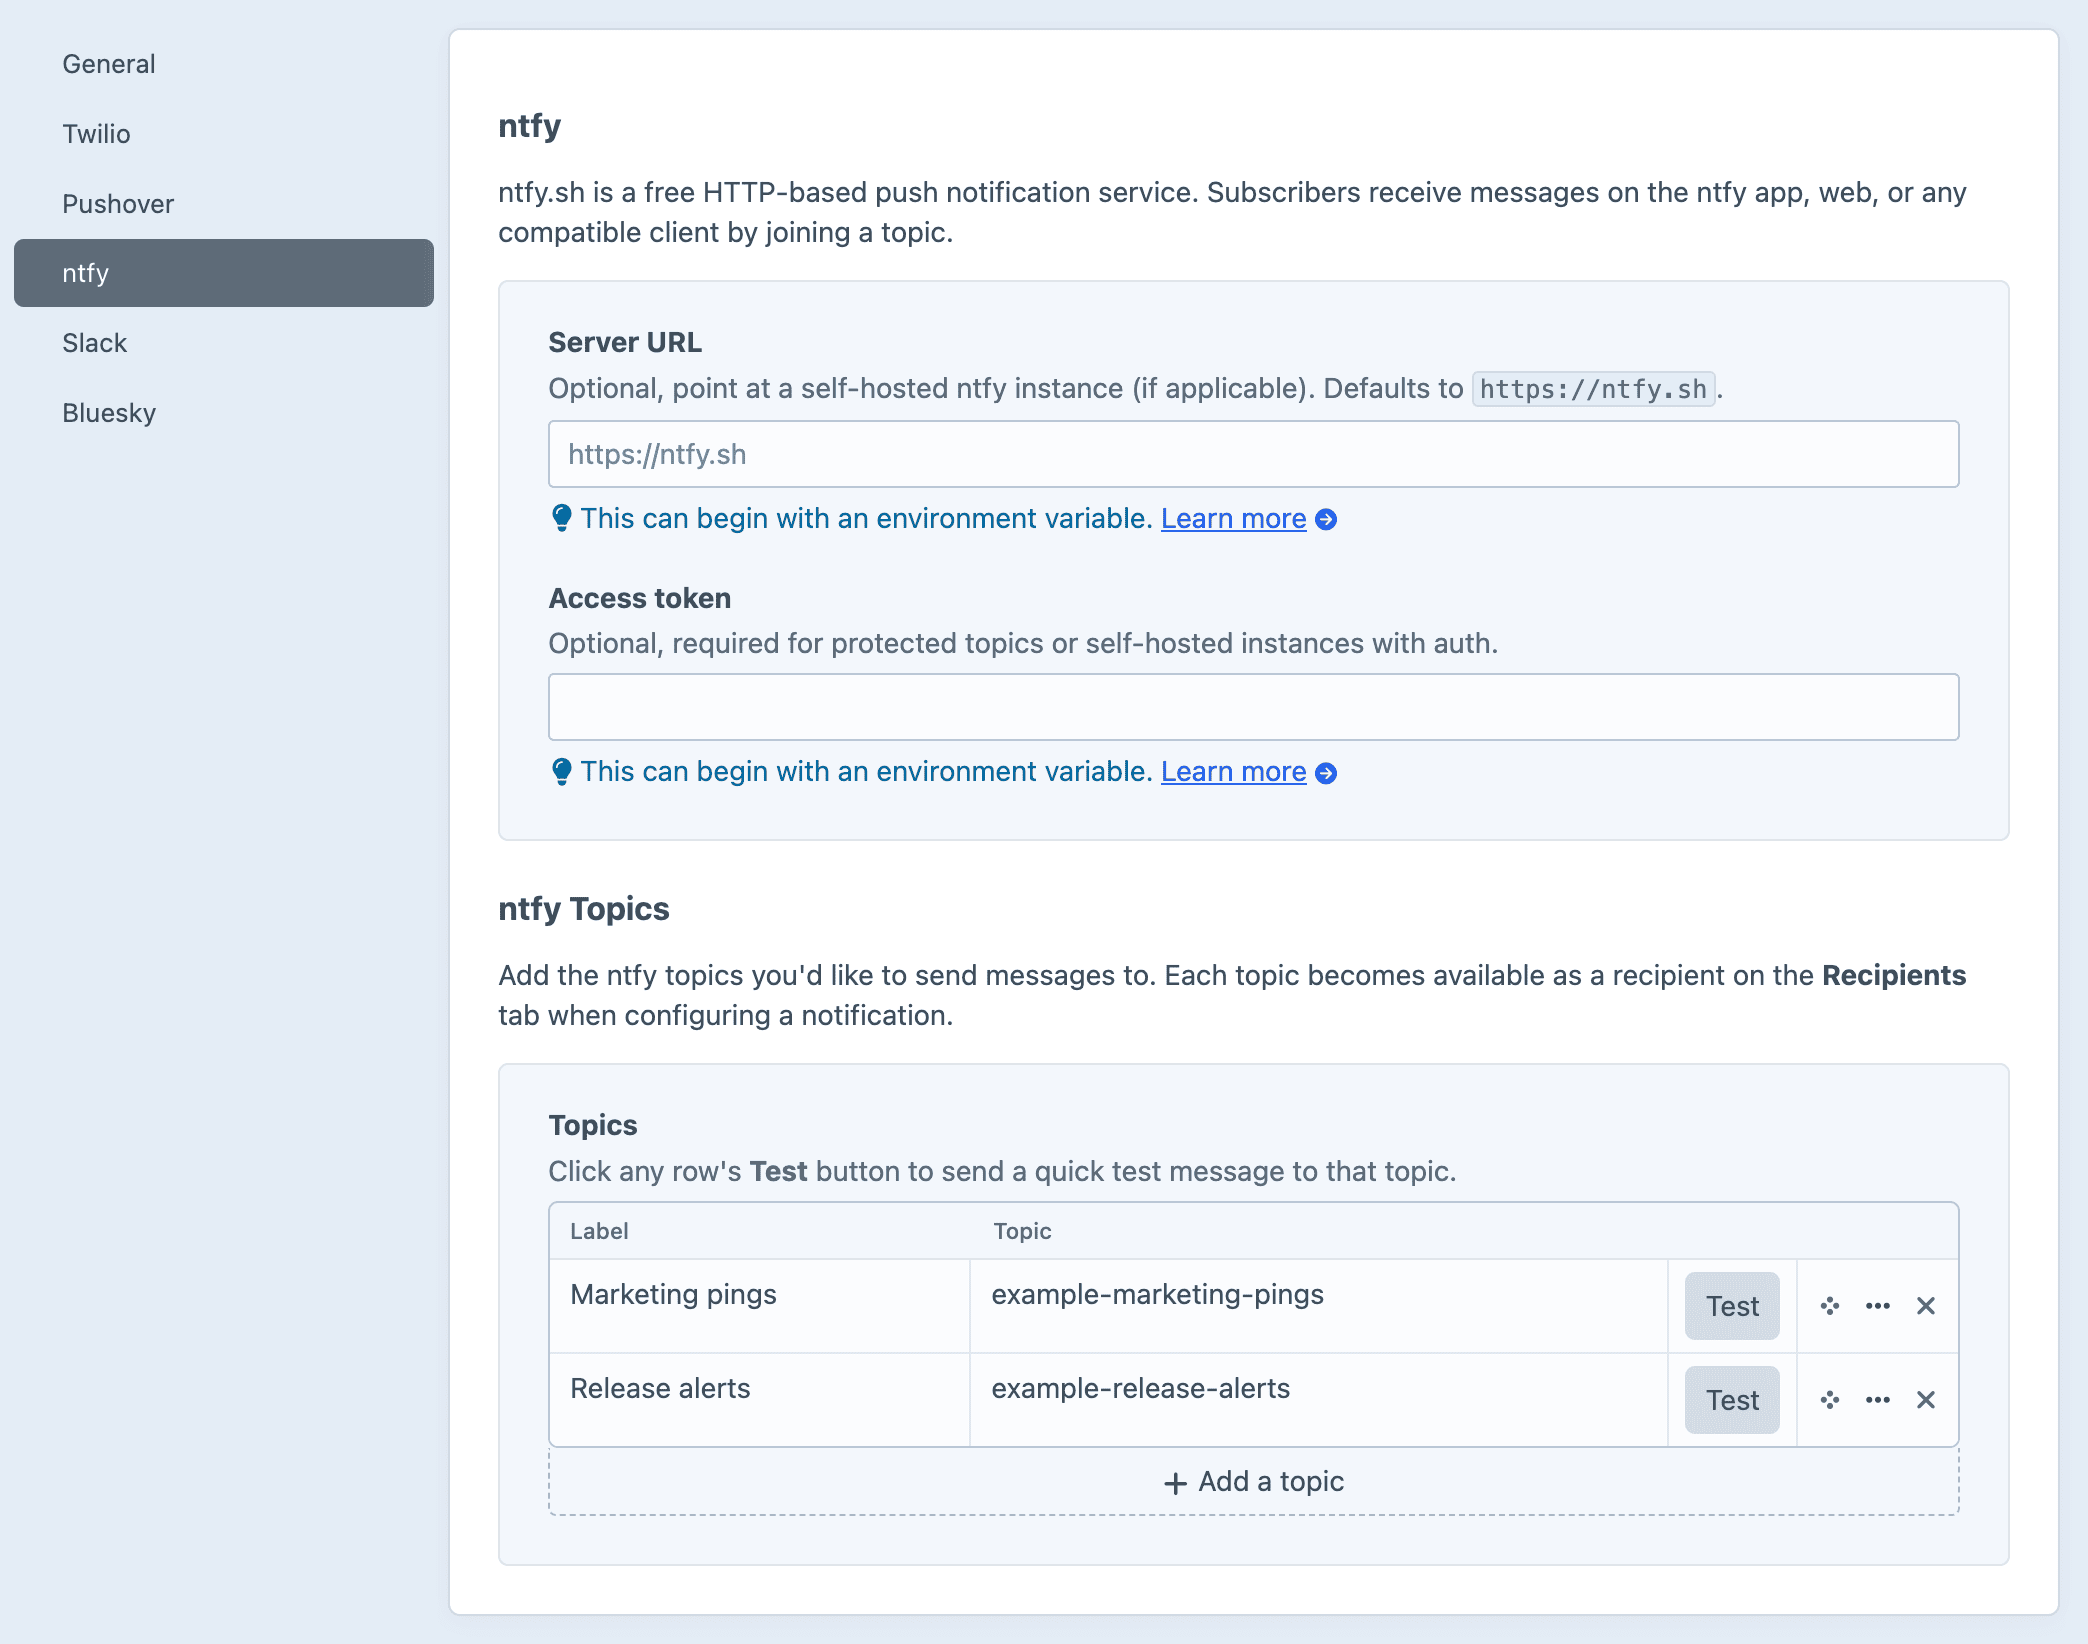
Optionally, you can also specify a self-hosted ntfy server URL and access token (if you're not using the default https://ntfy.sh server).
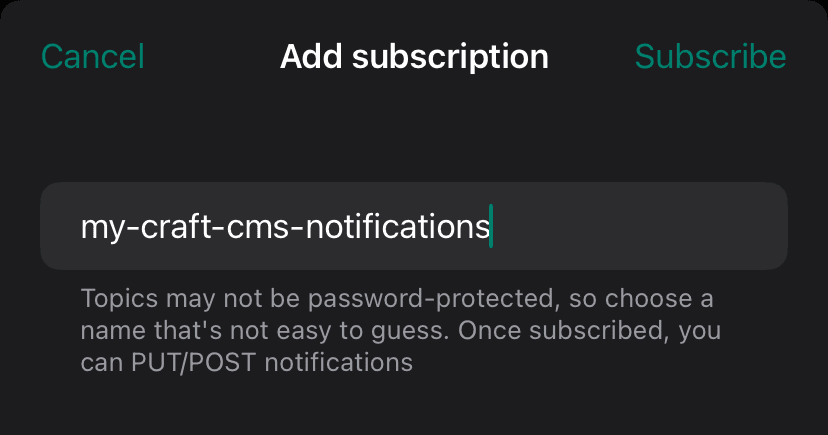
Subscribe to a topic
In ntfy, a "topic" is just a name. Anyone who is subscribed to it will receive messages posted to that topic.
Public by default
Topics are not private by default, so pick a hard-to-guess name (or pay for protected topics).
To watch a topic:
- Install the ntfy mobile app or open ntfy.sh in a browser.
- Subscribe to your chosen topic.
Self-hosted server URL (optional)
The default ntfy server is https://ntfy.sh. If you self-host ntfy, override the server URL via your .env file:
NTFY_SERVER_URL="https://ntfy.my-company.com"
NTFY_ACCESS_TOKEN="tk_..."
The access token is optional and only required for protected topics or self-hosted instances with authentication enabled.
Configure Notifier
In the Craft control panel, go to Settings → Plugins → Notifier → ntfy to:
- Optionally override the server URL (defaults to
https://ntfy.sh). - Optionally set the access token.
- Add one or more recipient topics.
Testing
You'll also find a simple Test button next to each topic in the settings.
Clicking it will trigger a test notification to be sent to that topic, to confirm each topic configuration is valid.