Configuring Bluesky
If using Bluesky to publish posts, you'll need a Bluesky account and one or more app passwords generated specifically for Notifier.
Generate an app password
Go to bsky.app/settings/app-passwords and click Add App Password.
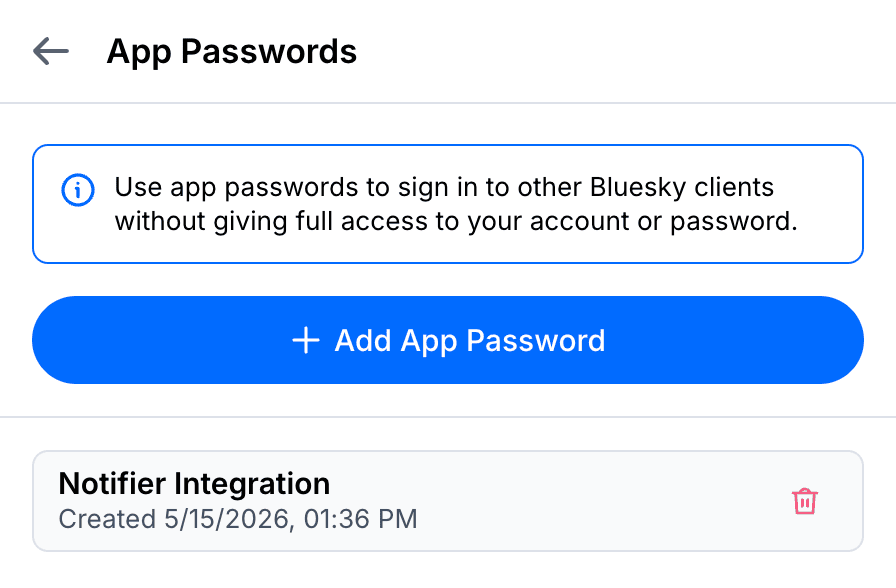
Give the app a unique name (e.g. "Notifier Integration") so you can identify it later.
Bluesky will then generate a password formatted as xxxx-xxxx-xxxx-xxxx.
🚨 Copy this new password immediately, you won't be able to see it again! 🚨
Use an App Password, not your Account Password
Bluesky's API does not accept the user's account main password for authentication. You must use an app password generated specifically for Notifier.
Self-hosted PDS (optional)
The default Bluesky PDS is https://bsky.social. If you federate against a custom PDS, override it via your .env file:
BLUESKY_PDS_URL="https://pds.my-company.com"Configure Notifier
First, store each app password in your .env file:
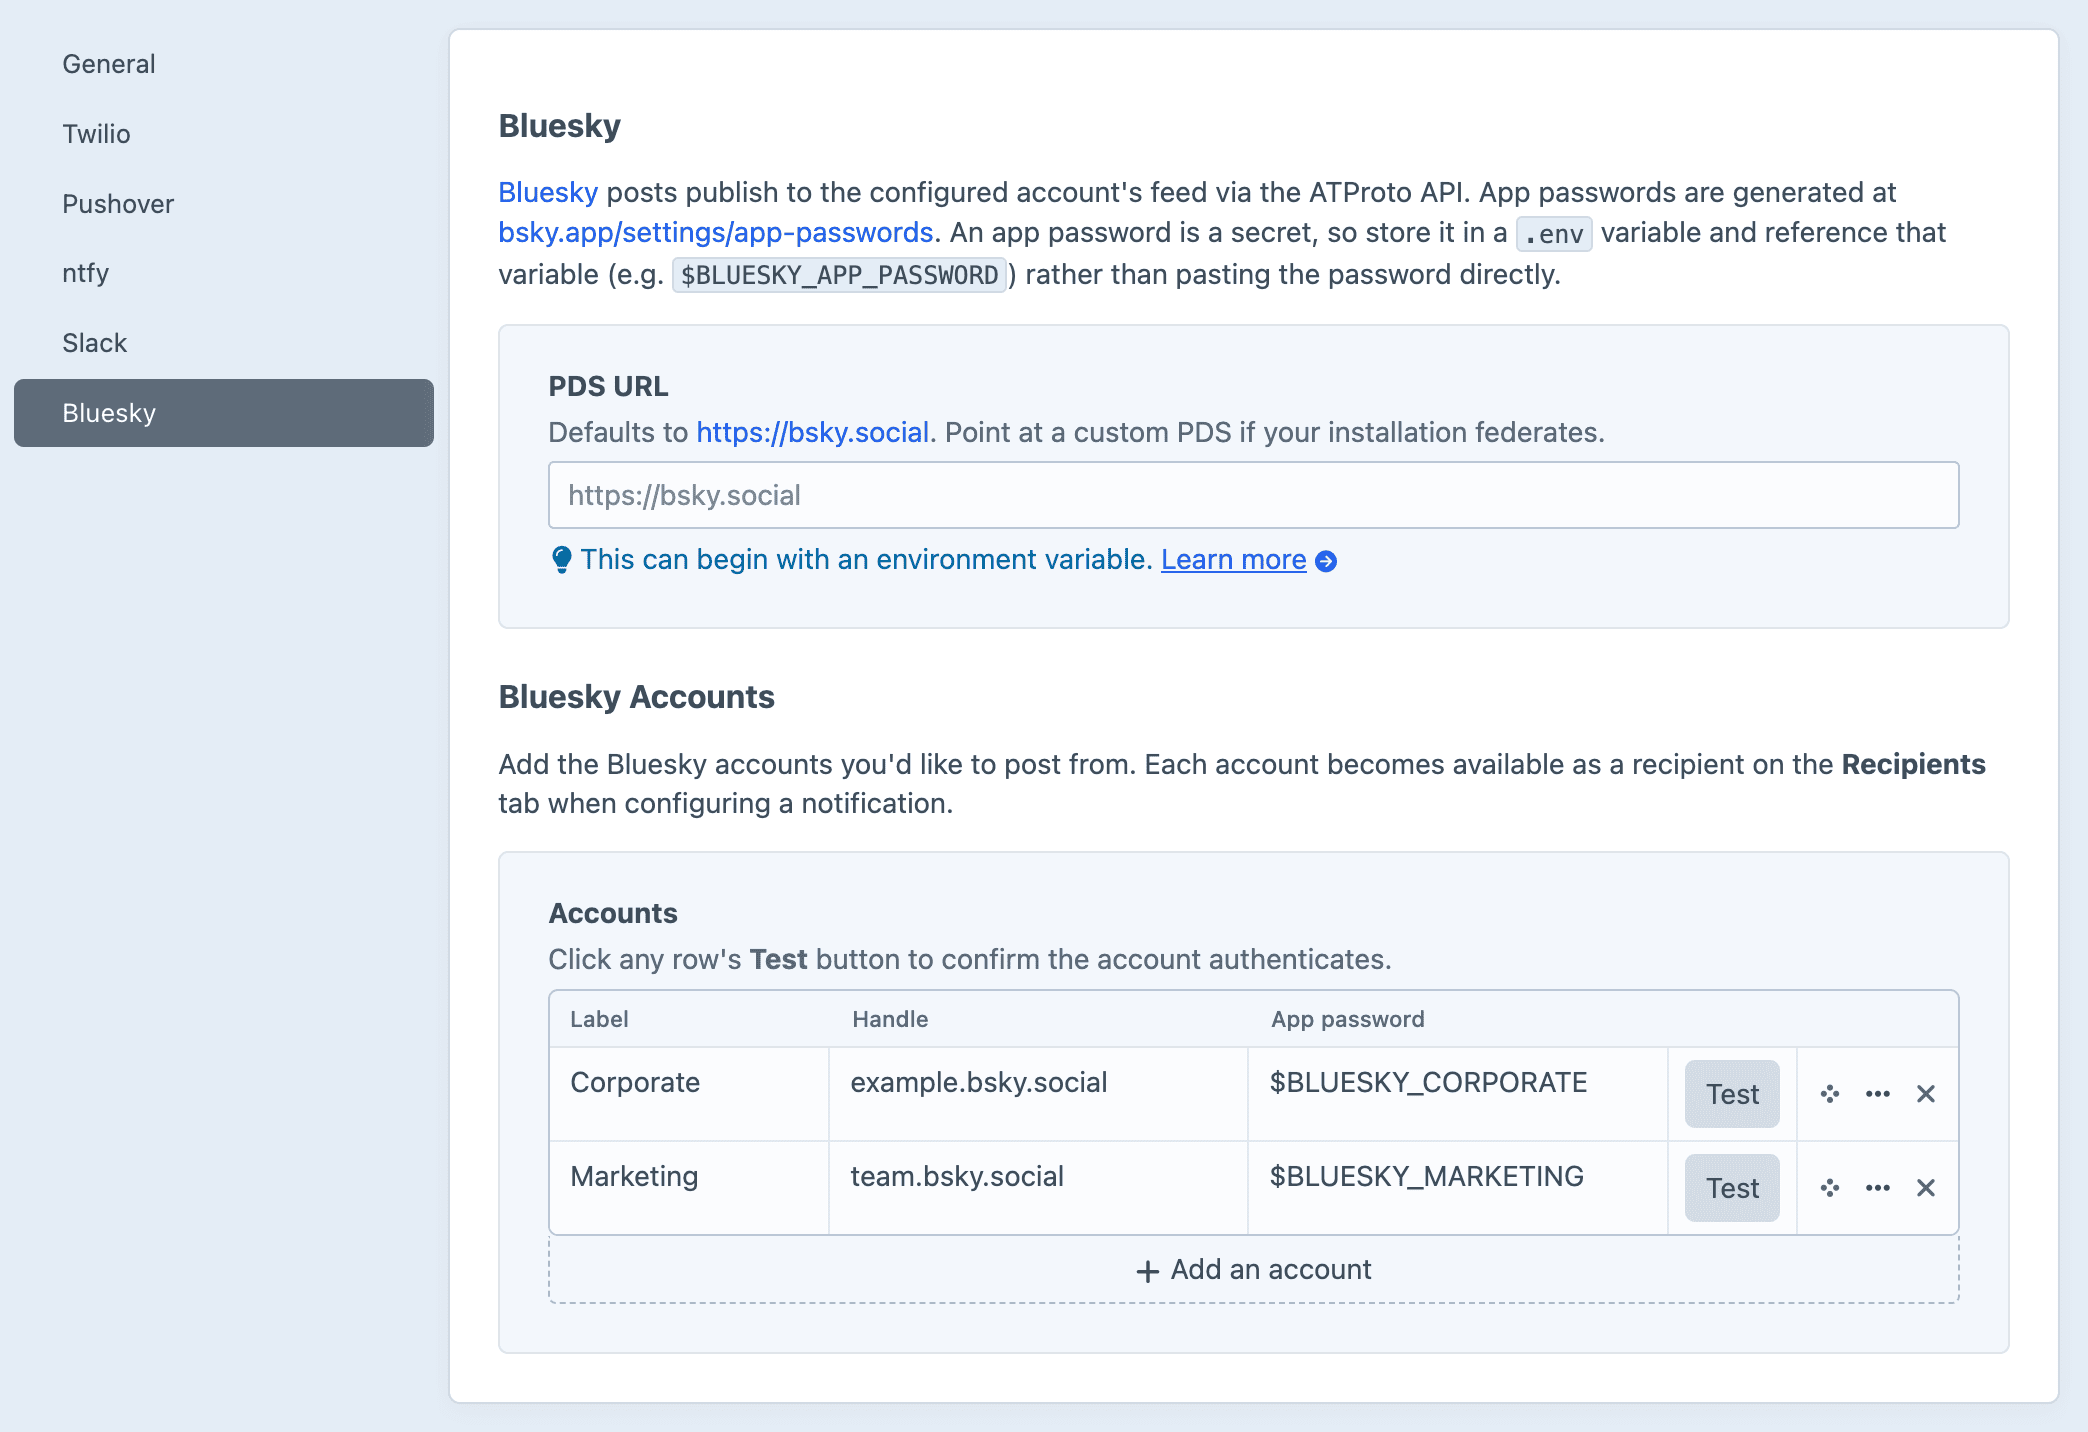
BLUESKY_APP_PASSWORD="xxxx-xxxx-xxxx-xxxx"Then in the Craft control panel, go to Settings → Plugins → Notifier → Bluesky to:
- Optionally set the PDS URL (defaults to
https://bsky.social). - Add one or more accounts with a friendly label and a Bluesky handle.
- In the App password field, use the
.envvariable (e.g.$BLUESKY_APP_PASSWORD). - Hit the Test button confirm the credentials authenticate for each account.
Testing does not post to Bluesky
The Test button only verifies that the credentials are valid. It will not create a post on Bluesky.
You'll need to configure a new Notification to manually test a real post.