
Configuring Facebook
Setting up both Facebook and Instagram?
If you also plan on setting up Instagram, it's highly recommended to set up both integrations simultaneously.
The setup for Facebook and Instagram are nearly identical. A Facebook Page is required for posting to Instagram.
⚠️ Handling them separately will lead to a significant amount of repeated work.
If using Facebook to post page updates, you'll need to create a Meta app and generate a Page Access Token.
Setup is a very long and complicated process, but should only need to be done once per Page. If you have multiple Pages, repeat the process for each individual Page. Only Pages are supported, not personal profiles.
Synergy with Instagram
Instagram relies on the same Meta app and Page Access Token we are about to create.
If you are also adding Instagram:
- First, complete the two requirements in the Instagram setup guide.
- Then, come back to this page to follow the Facebook setup guide.
Do the Instagram setup first!
If using Instagram, it's critical that you perform those setup instructions before proceeding with Facebook setup.
Get started with Facebook
In the steps below, Instagram-specific instructions will be prefixed with "If also setting up Instagram".
Register as a Meta developer
Developer account required
Already have a Meta developer account? Skip ahead to "Create a Meta app".
- Log in with your Facebook account at developers.facebook.com.
- Click Get Started in the top-right corner.
- Click Continue to accept the Platform Terms and Developer Policies.
- Verify your account when prompted, by confirming your email and a phone number if asked.
- If asked "Which best describes you?", choose Developer.
Create a Meta app
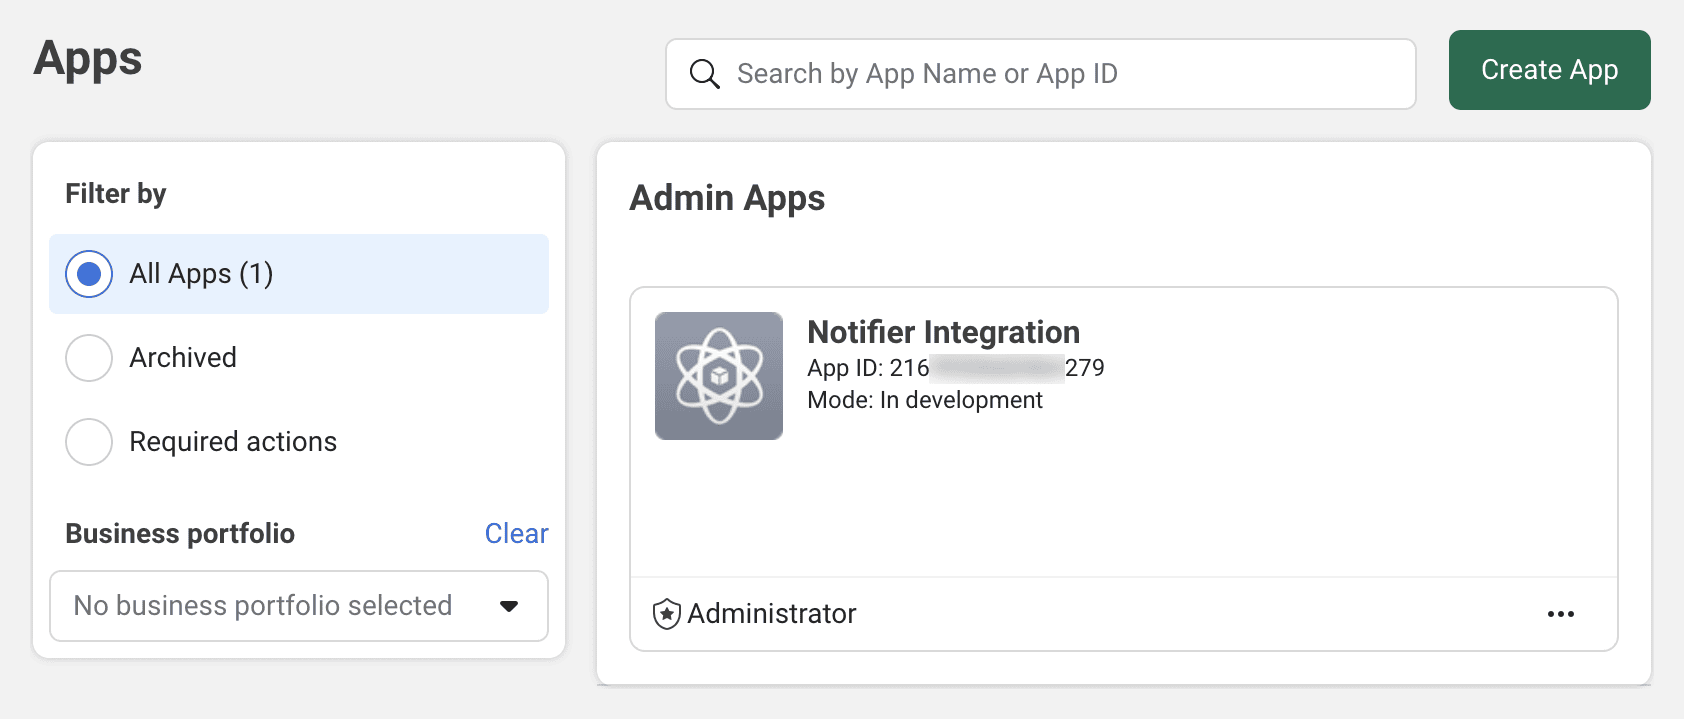
- Sign in at developers.facebook.com, open the My Apps menu in the top-right corner.
- Click the Create app button. If a popup modal appears, click Create app to continue.
- Enter an App name and App contact email, then click Next.
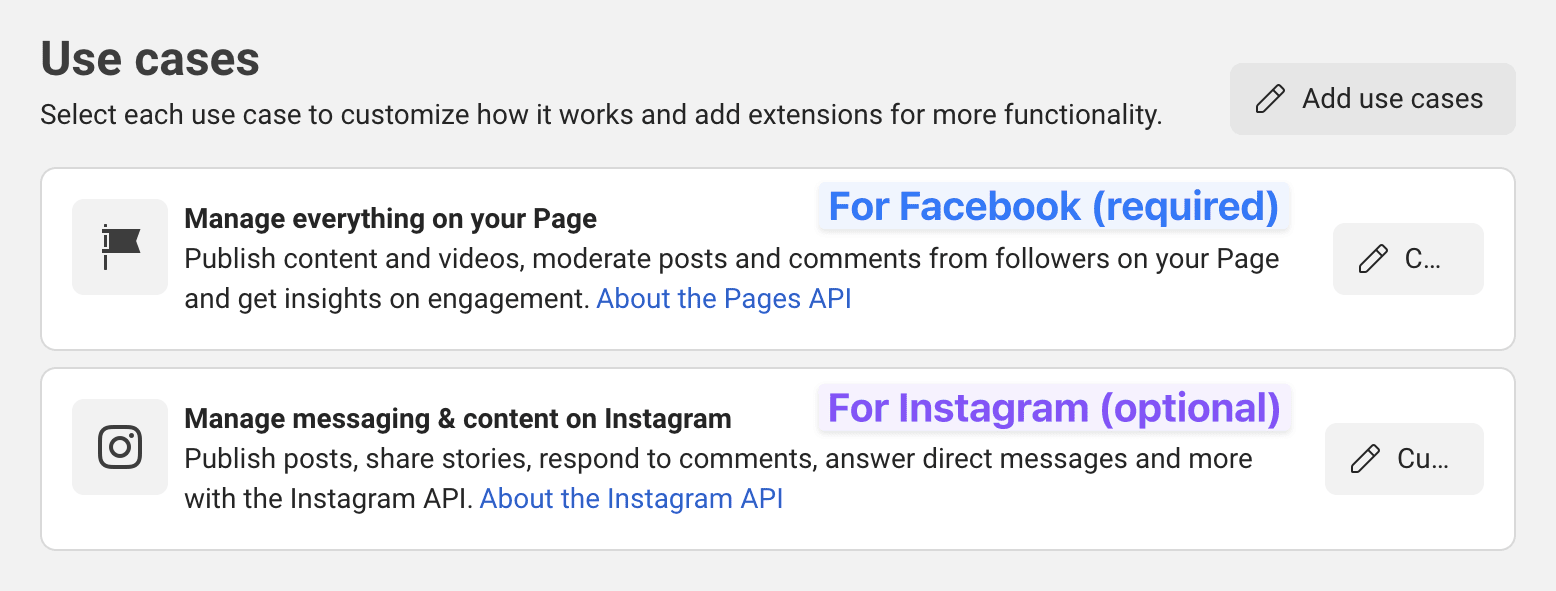
- On the Use cases step, set Filter by to Content management.
- Select Manage everything on your Page, then click Next.
- On the Business step, connect a business portfolio if you have one (or skip it for now), then click Next.
- Work through the Requirements and Overview steps to finish creating the app.
- You may be prompted to re-enter your password for security purposes.
- On the dashboard, click Customize the Manage everything on your Page use case.
- Add the
pages_manage_postsandpages_read_engagementpermissions (pages_show_listis already included).
If also setting up Instagram, add the Instagram use case to the same app:
- In the left sidebar, open Use cases, then click Add use cases.
- Select Manage messaging & content on Instagram, then click Add.
- When prompted, choose API setup with Facebook login. Do not choose "API setup with Instagram login", since we authenticate through Facebook.
- Open the Permissions and features list, then click Add next to
instagram_basicandinstagram_content_publish.
Generate a Page Access Token
- Open the Graph API Explorer.
- In the Meta App dropdown, select your app.
- Under Permissions, click Add a Permission and add
pages_manage_posts,pages_read_engagement, andpages_show_list. - If also setting up Instagram, add
instagram_basicandinstagram_content_publishas well. - Click Generate Access Token.
- On the Pages access screen, choose Opt in to current Pages only and select your target Page (or Opt in to all current and future Pages), then click Continue.
- Review the app's access request, then click Save.
- Copy the newly-generated Access Token.
Use that short-lived token to get a long-lived Page Access Token
Extend the token timeline
The token you just copied is short-lived, expiring within an hour or so. Let's turn it into a Page Access Token that won't expire on its own.
- Open the Access Token Debugger, paste your token, and click Debug.
- Click Extend Access Token at the bottom.
- You may be prompted to re-enter your password for security purposes.
- A new token will appear below the button. Copy it.
- Switch back to the Graph API Explorer.
- Paste the new token into the Access Token field.
- In the request field showing
me?fields=id,name(just left of Submit), clear it and typeme/accounts. - Click Submit. If the response isn't empty, copy and save:
- The
idof the Page you want to post to. - The
access_tokenfor that Page. This is your long-lived Page Access Token.
- The
- If those values were not returned, see the Troubleshooting section below.
- Save the Page
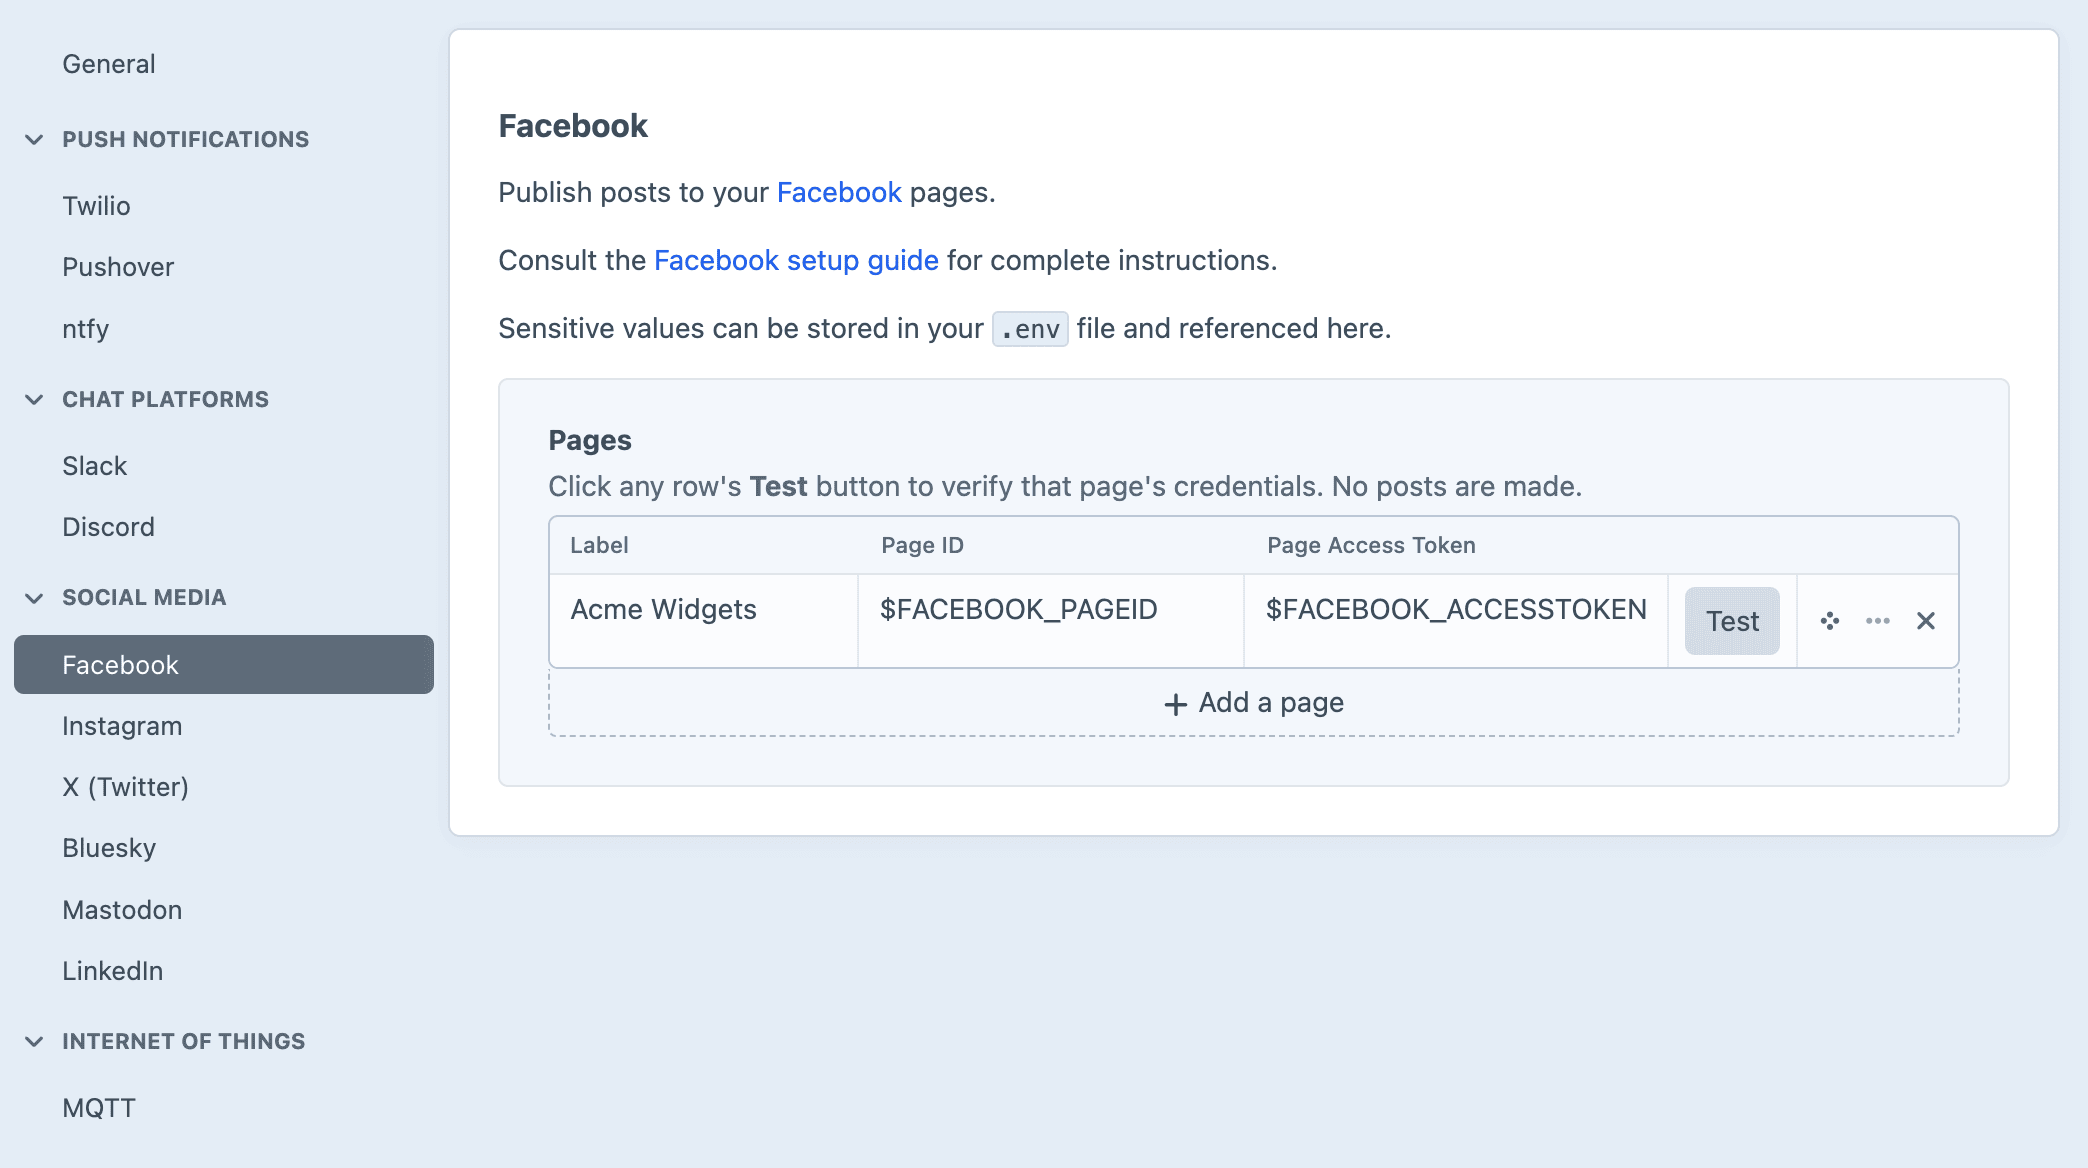
idandaccess_tokeninto your.envfile so you may reference them later.
Protect the Page Access Token
Anyone with the token can post as your Page. Treat it like an API key. Keep it in a .env variable so the secret never ends up in your project config.
To verify the token is long-lived, you can paste the final Page Access Token back into the Access Token Debugger. If all went smoothly, Expires should read Never.
Troubleshooting
If you received an empty response from me/accounts
In some cases, me/accounts can return an empty {"data": []}. When that happens, the Page is almost certainly owned by a Business Portfolio. Pages managed through Meta Business Suite usually are, and they do not appear on me/accounts even when your token is correct.
Fortunately, you can still get what you need if you have the Page ID.
Within the Meta Business Suite, look under Settings → Account → Pages to track down the Page ID.
In the request field of the Graph API Explorer, replace me/accounts with one of these:
Facebook only
[PAGE_ID]?fields=name,access_tokenFacebook + Instagram
[PAGE_ID]?fields=name,access_token,instagram_business_account{id,username}Replace the [PAGE_ID] placeholder with your numeric Page ID.
Click Submit, then copy the access_token from the response. That is your long-lived Page Access Token.
IMPORTANT
The {id,username} segment does not represent placeholders. Please copy it verbatim.
When temporary access is no longer good enough
Facebook can be very strict about permissions, and the rules tighten the moment you move past testing on your own Pages. Most of these blockers are enforced by Meta, not by Notifier, so they have to be resolved on Facebook's side. Here are the ones you are most likely to hit, roughly in the order they tend to appear.
If also setting up Instagram, everything in this section applies the same way, since Instagram publishes through the same token. If a test fails to resolve an Instagram account, the account and the Page are not connected. Confirm it is a Business or Creator account, then redo the linking prerequisite on the Instagram page.
Confirm your identity first
Facebook often requires the Page admin to confirm their identity before an app can publish. If a test post fails with "Confirm your identity before you can publish as this Page", that step hasn't been completed yet. This is a Meta account requirement, not a Notifier setting.
Your token is fine
Seeing this error means your token is valid. An expired or invalid one fails differently, so regenerating it won't help here.
Meta asks for different things depending on the account, so work through whatever it presents. Common steps include:
- Linking a Business Profile to the account.
- Verifying a business email address.
- Verifying a phone number by SMS, from the Facebook mobile app.
- Confirming your identity with a government-issued photo ID at facebook.com/id.
- Turning on two-factor authentication and confirming your primary country.
This all falls under Meta's broader Page Publishing Authorization, which mainly affects Pages with large audiences (especially in the US). You can check or finish these tasks under the Page's to-do list in Meta Business Suite. Once Meta approves, the Page can publish again, by hand and through the API.
Request Advanced Access for Pages you don't manage
Development mode (Meta calls it Standard Access) only lets your app act on Pages where you hold an app role. The moment you want to post to a Page you don't administer, such as a client's Page, or open the integration up beyond your own account, you need Advanced Access for pages_manage_posts and its companion permissions.
If also setting up Instagram, the same App Review covers instagram_content_publish.
Advanced Access is granted through App Review, and App Review now requires Business Verification: confirming a legal business entity with documents, verifying a domain, and sometimes a callback from Meta. Newer apps may also be asked to register as a Tech Provider and complete access verification. Plan for this to take days, not minutes, with some back-and-forth along the way.
When a token that worked suddenly stops
A long-lived Page Access Token is durable, but it is not permanent. Facebook will quietly invalidate it when any of these happen:
- The account that generated it changes its password, or loses admin access to the Page.
- You remove the app, or revoke its permissions, from your Facebook account.
- Meta forces a security re-authentication, or a periodic Data Use Checkup goes unanswered.
- You link a Business Profile or finish verification, which can re-associate the app with your account and break the old grant.
When this happens, the post fails with an OAuthException. You may see:
- Code 190: "Error validating access token: Session has expired", or a note that the session was invalidated because the password changed.
- Code 200: "Cannot call API for app ... on behalf of user ...", meaning the app is no longer authorized to act for that account.
Either way the fix is the same: generate a fresh Page Access Token by repeating the steps above, then save the new value to your .env file.