Configuring Discord
If using Discord to post channel messages, you'll first need to create an Incoming Webhook for each channel you want to post into. A webhook URL is both the credential and the destination, there's no separate token or bot to manage.
Create an Incoming Webhook
Only your own Discord server
The "Edit Channel" link is only available within Discord servers you manage.
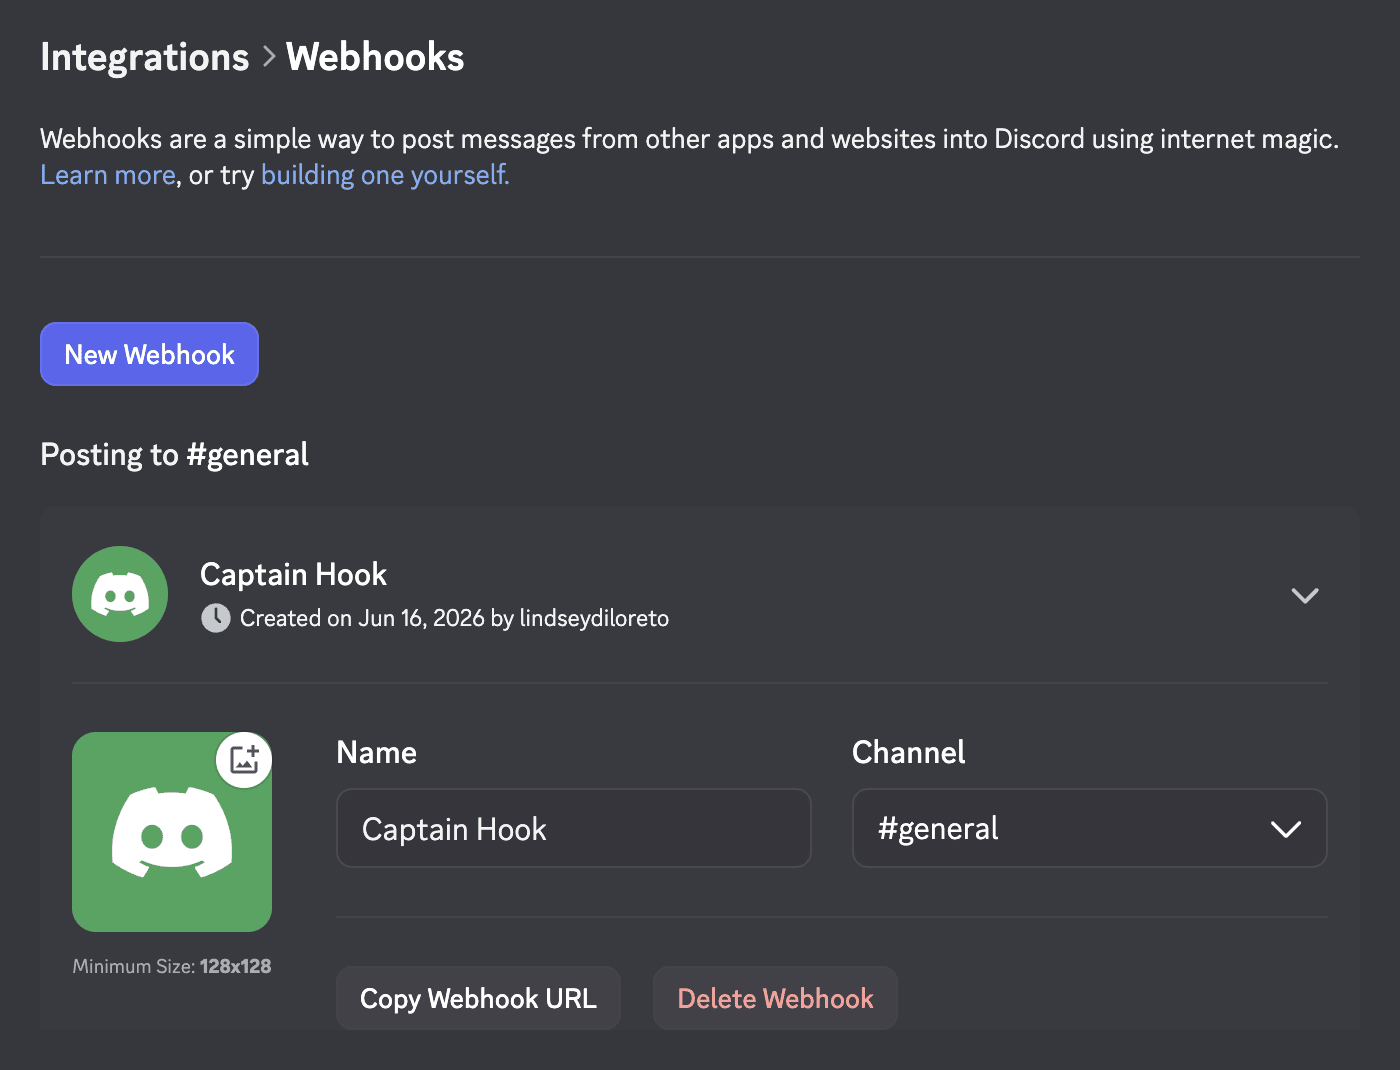
- In Discord, hover over the target channel and click the gear icon to open Edit Channel.
- Open Integrations → Webhooks.
- Click New Webhook, give it a name, and pick the channel.
- Click Copy Webhook URL.
Protect the Webhook URL
Anyone who knows the webhook URL can post to the channel. Treat it like an API key. Keep it in a .env variable so the secret never ends up in your project config.
Configure Notifier
First, store each webhook URL in your .env file:
DISCORD_GENERAL="https://discord.com/api/webhooks/..."
DISCORD_MARKETING="https://discord.com/api/webhooks/..."
DISCORD_PETS="https://discord.com/api/webhooks/..."
# ... add all relevant webhook URLs
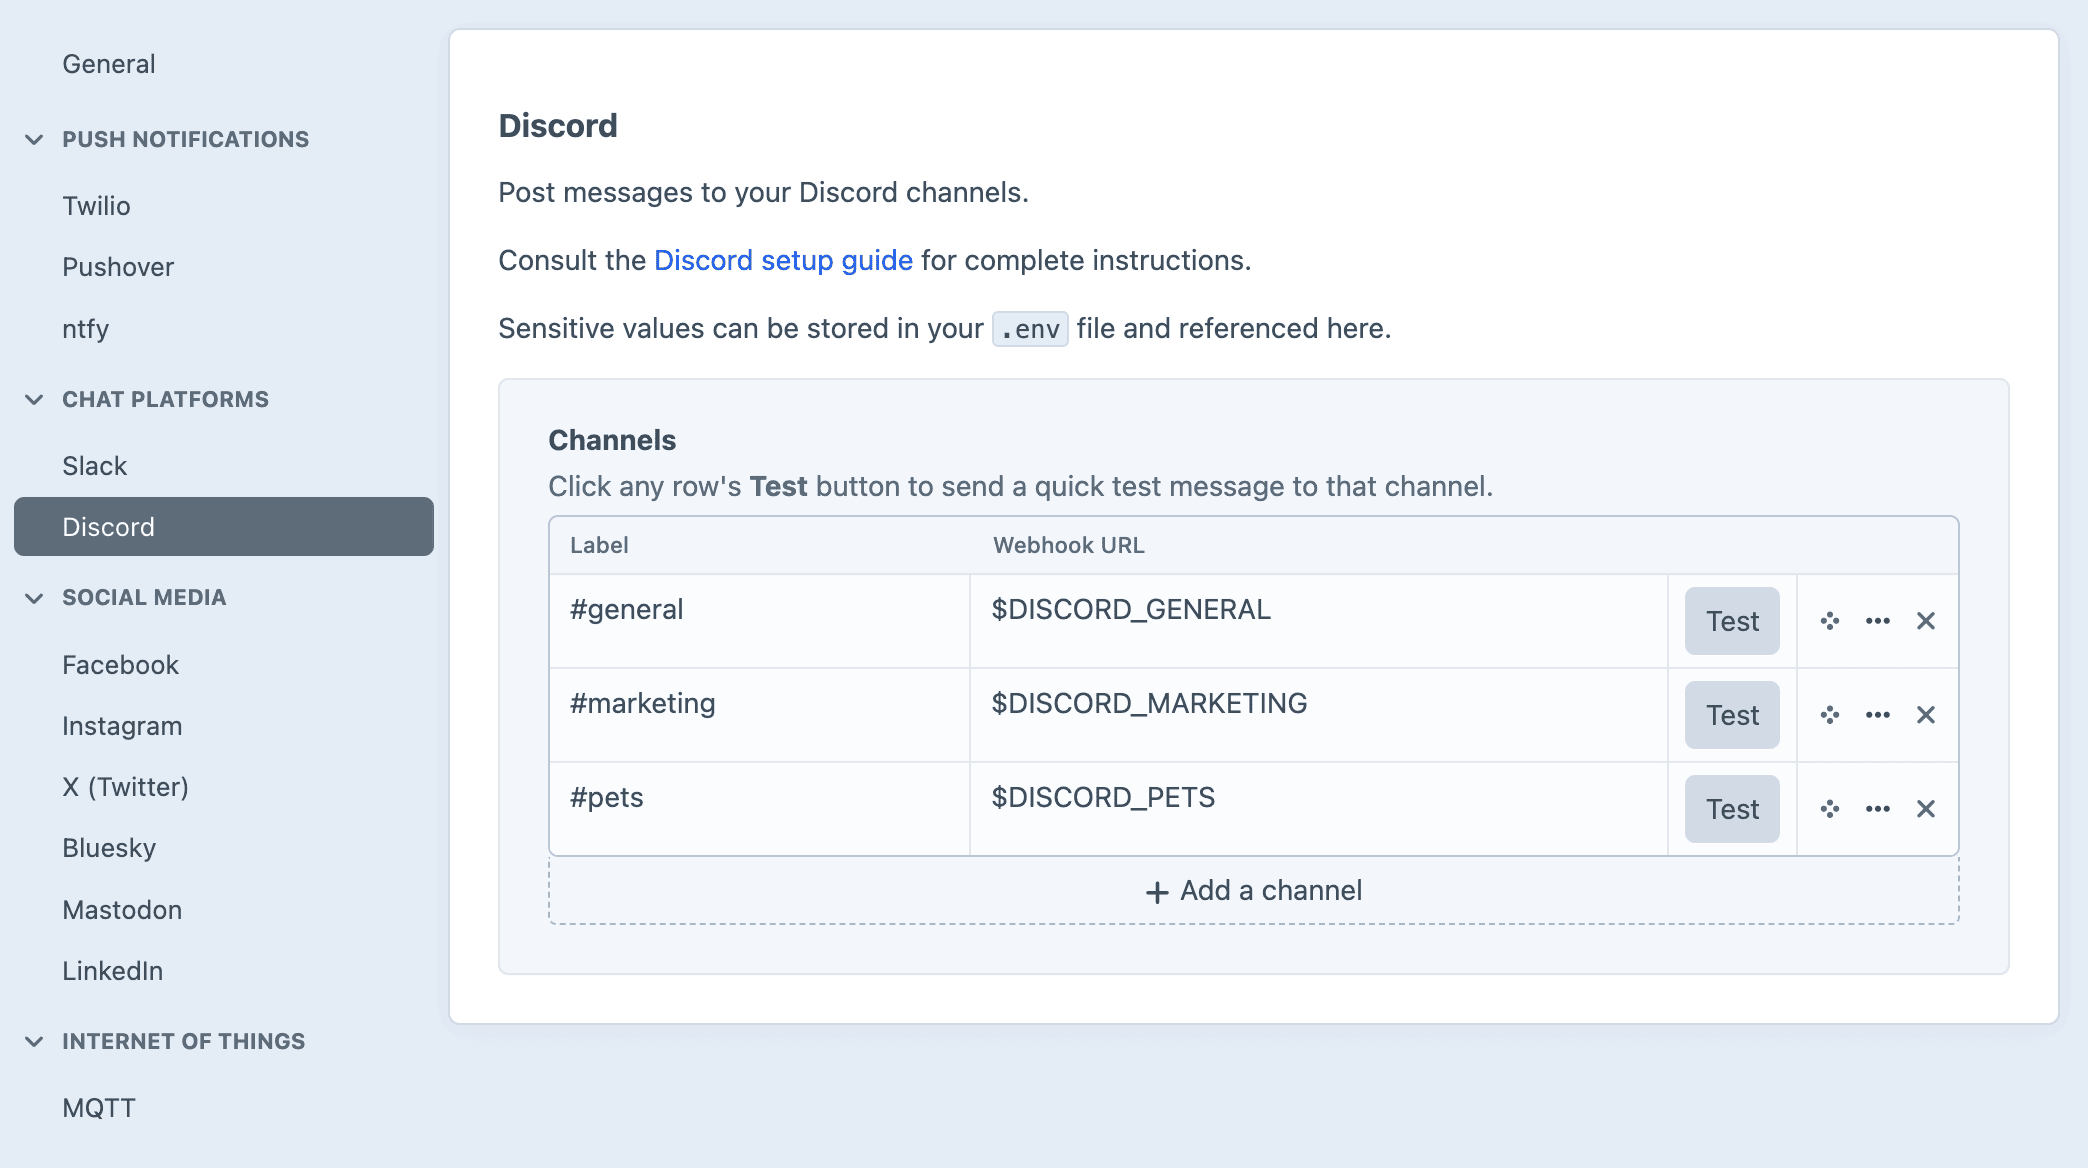
Then in the Craft control panel, go to Settings → Plugins → Notifier → Discord to:
- Add one or more channels with a friendly label (e.g.
#general). - In the Webhook URL field, reference the
.envvariable (e.g.$DISCORD_GENERAL). - Hit the Test button next to each channel to confirm it delivers to the right place.
Sending to multiple Discord channels
Each channel needs its own webhook. Add a separate row in Settings → Discord for each channel, using that channel's webhook URL and a friendly label.
A single notification can simultaneously post to multiple channels, or you can set up separate notifications which post to different channels.